Angular 4 is a good choice for building modern web applications. It comes bundled with Test utilities that makes it easy to write good quality test cases quite easily. Angular official testing guide does a good job explaining how to get started with testing Angular components. One thing that it does not cover is how to test components that use two way data binding using ngModel directive. Last week I had to write test case for a component that uses data binding so I end up learning a lot about testing such components. In this blog, I will share my learnings with you.
The Example Angular 4 application
Let's build a quick and dirty example of a component that uses data binding. Navigate to a convenient directory on your file system and run the command mentioned below. This assumes you have Angular CLI installed on your machine. You can learn more about Angular CLI here.
$ ng new myapp --skit-git
$ cd myapp
$ npm install
$is used to denote bash prompt. You don't have to type it on your command-line terminal.The skip-git option tell Angular to skip creating a Git repository.
This will create our sample Angular project with a single AppComponent. You can run the app using npm start command. In this blog, we will only focus on tests so there is no need to run the application.
To run the generated test cases for our sample application, you can run npm test command. The command will run all the generated test cases and you should see a message like as shown below.
Chrome 59.0.3071 (Mac OS X 10.12.5): Executed 3 of 3 SUCCESS (0.172 secs / 0.157 secs)
Let's update the AppComponent to make it use ngModel.
Update app.component.ts to as shown below.
import { Component, Injectable } from '@angular/core';
import { TaskService } from './task.service';

@Component({
  selector: 'app-root',
  templateUrl: './app.component.html',
  styleUrls: ['./app.component.css']
})
export class AppComponent {
  title = 'Task 1';
  updateCount = 0;

  constructor(private taskService: TaskService) { }

  onUpdate(title) {
    this.taskService.update(title)
      .then(res => {
        this.title = title;
        this.updateCount++;
      });
  }
}
Update app.component.html to as shown below.
<input name="title" type="text" value={{title}} [(ngModel)]="title" (keydown.enter)="onUpdate(title)">
<h2>{{title}}</h2>
<h3>Updated: {{updateCount}} times</h3>
Last thing you have to update to make application run is app.module.ts.
import { TaskService } from './task.service';
import { BrowserModule } from '@angular/platform-browser';
import { NgModule } from '@angular/core';
import { FormsModule } from '@angular/forms';

import { AppComponent } from './app.component';

@NgModule({
  declarations: [
    AppComponent
  ],
  imports: [
    BrowserModule,
    FormsModule
  ],
  providers: [TaskService],
  bootstrap: [AppComponent]
})
export class AppModule { }
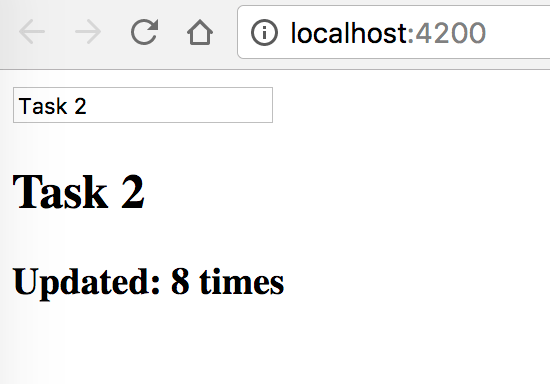
To see component in action, you can run the application using npm start command. The application does two things:
-
It shows what user enters in an
<h2>tag. -
If user presses enter, it update
updateCountby 1 and shows that on the screen.
The screenshot below shows how the updated task and count of times we have pressed enter.
The full source code of the application is on Github: shekhargulati/unit-testing-ngmodel-in-angular4
Writing test for ngModel
Now, that we have an example component to play with let's learn how we can write test cases for it. Before we start, let's see what happens when we run our existing tests. You can run tests using ng test command.
As expected all the test cases will fail. The reason will be logged in the stack trace as shown below.
Can't bind to 'ngModel' since it isn't a known property of 'input'.
This is easy to fix. The app.component.spec.ts does not import FormsModule so we just have to import it in the TestBed.configureTestingModule as shown below to fix this problem.
import { TestBed, async } from '@angular/core/testing';
import { FormsModule } from '@angular/forms';

import { AppComponent } from './app.component';

describe('AppComponent', () => {
  beforeEach(async(() => {
    TestBed.configureTestingModule({
      declarations: [
        AppComponent
      ],
      imports: [FormsModule]
    }).compileComponents();
  }));
  // .. rest removed for brevity
After making that change, the tests will again fail. This time they will fail because of Error: No provider for TaskService! error.
The problem is that our test is unable to inject TaskService to the AppComponent. There are couple of ways you can fix the error as mentioned in the Angular testing guide. I prefer to inject the real service and then use Jasmine spy utilities to mock out actual method calls. So, to fix this error we will have to specify TaskService in the providers section of TestBed.configureTestModule as shown below.
describe('AppComponent', () => {
  beforeEach(async(() => {
    TestBed.configureTestingModule({
      declarations: [
        AppComponent
      ],
      imports: [FormsModule],
      providers: [TaskService]
    }).compileComponents();
  }));
Now, one of three test cases will pass. The two tests that failed are not required so we can delete them. We will write new tests for our component. The full spec file with single passing test is shown below.
import { TaskService } from './task.service';
import { TestBed, async } from '@angular/core/testing';
import { FormsModule } from '@angular/forms';

import { AppComponent } from './app.component';

describe('AppComponent', () => {
  beforeEach(async(() => {
    TestBed.configureTestingModule({
      declarations: [
        AppComponent
      ],
      imports: [FormsModule],
      providers: [TaskService]
    }).compileComponents();
  }));

  it('should create the app', async(() => {
    const fixture = TestBed.createComponent(AppComponent);
    const app = fixture.debugElement.componentInstance;
    expect(app).toBeTruthy();
  }));
});
Now, that our existing test is green we will write new tests to test the behaviour of our component.
Test case : Should display default title in h2 tag
The existing test case does not test whether Task 1 is shown on the screen. If you don't know that Angular does not update bindings automatically in the tests, then you could think that test could be written like as shown below.
it('should show default task in h2 tag', () => {
  const fixture = TestBed.createComponent(AppComponent);
  const de = fixture.debugElement.query(By.css('h2'));
  expect(de.nativeElement.textContent).toEqual('Task 1');
});
When you run the test case, it will fail with the following message.
Expected '' to equal 'Task 1'.
As mentioned above, this is because Angular does not automatically do change detection. Angular provides a testing utility on the fixture instance called detectChanges that you have to call manually to tell Angular to force change detection. The updated test case is shown below.
  it('should show default task in the h2', () => {
    const fixture = TestBed.createComponent(AppComponent);
    fixture.detectChanges();
    const de = fixture.debugElement.query(By.css('h2'));
    expect(de.nativeElement.textContent).toEqual('Task 1');
  });
After you save your tests, Angular will automatically run the test cases. This time both the test case will pass.
Chrome 59.0.3071 (Mac OS X 10.12.5): Executed 2 of 2 SUCCESS (0.148 secs / 0.139 secs)
Test case : Should keep input and h2 in sync
The purpose of this test case is to test two way data binding. In the previous test, we tested that component rendered default title successfully. In this test, we will test that when we change title in the input, it is automatically reflected in the h2 as well. We could write this test case as shown below.
it('should keep input and h2 in sync', () => {
  const fixture = TestBed.createComponent(AppComponent);
  fixture.detectChanges();
  const inputDe = fixture.debugElement.query(By.css('input[name="title"]'));
  const inputEl = inputDe.nativeElement;
  inputEl.value = 'Updated Task 1';
  inputEl.dispatchEvent(new Event('input'));
  fixture.detectChanges();
  const de = fixture.debugElement.query(By.css('h2'));
  expect(de.nativeElement.textContent).toEqual('Updated Task 1');
});
In the test case shown above, we did following:
- First, we queried the input element and then updated its value.
- Next, we dispatched a DOM Event so that Angular learns about of input value change.
-
As mentioned before, we have to call
detectChangesmanually to enforce Angular change detection. -
Finally, we verified that
h2has updated title.
Is the above test fully correct? Look at your Karma runner in the browser and you will notice something incorrect.
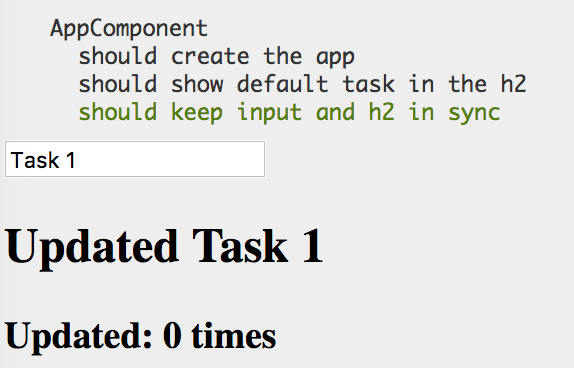
As you can see, the input didn't have the updated value. h2 was updated but input still has the old Task 1 value.
The reason for this behaviour is that NgModel updates are asynchronous. So, we have to give fixture some time before we can see those changes. This can be fixed in two ways.
Option 1: Use async with fixture.whenStable
The first way to fix this is by using Angular async utility. It makes your tests run in a special test zone. In the code shown below, first we wrapper our test in the async method and then we moved change detection call in the fixture.whenStable(). You can verify the Karma runner in the browser to see the updated value in the input box.
it('should keep input and h2 in sync', async(() => {
  const fixture = TestBed.createComponent(AppComponent);
  fixture.detectChanges();
  const inputDe = fixture.debugElement.query(By.css('input[name="title"]'));
  const inputEl = inputDe.nativeElement;
  inputEl.value = 'Updated Task 1';
  inputEl.dispatchEvent(new Event('input'));
  fixture.whenStable().then(() => {
    fixture.detectChanges();
    const de = fixture.debugElement.query(By.css('h2'));
    expect(de.nativeElement.textContent).toEqual('Updated Task 1');
  });
}));
Option 2: Use fakeAsync and tick
The async method still feels like we are working async code. So, Angular team provides another utility that make us feel we are writing synchronous code. This utility is fakeAsync. The use of fakeAsync is shown below. Note, that we used tick utility function as well. This is also Angular testing utility function. It simulates passage of time until all pending asynchronous activities finish. So, after dispatching the event we called tick() to wait for Angular to handle the event and take necessary action.
it('should keep input and h2 in sync', fakeAsync(() => {
  const fixture = TestBed.createComponent(AppComponent);
  fixture.detectChanges();
  const inputDe = fixture.debugElement.query(By.css('input[name="title"]'));
  const inputEl = inputDe.nativeElement;
  inputEl.value = 'Updated Task 1';
  inputEl.dispatchEvent(new Event('input'));
  tick();
  fixture.detectChanges();
  const de = fixture.debugElement.query(By.css('h2'));
  expect(de.nativeElement.textContent).toEqual('Updated Task 1');
}));
Test case: Should display number of times title was updated by pressing enter button
The last test will verify the behaviour of pressing the enter button. This time we have to handle one more thing — a service call. In your test cases, you will prefer to use mock or stubs. The real service might be invoking a network service so unit tests should use mocks or stubs. The test case shown below dispatches keydown event to simulate the user action.
it('should display number of times title was updated by pressing enter button', fakeAsync(() => {
  const fixture = TestBed.createComponent(AppComponent);
  const taskService = fixture.debugElement.injector.get(TaskService);
  const spy = spyOn(taskService, 'update').and.returnValue(Promise.resolve('success'));
  fixture.detectChanges();
  const inputDe = fixture.debugElement.query(By.css('input[name="title"]'));
  const inputEl = inputDe.nativeElement;
  inputEl.value = 'Updated Task 1';
  inputEl.dispatchEvent(new Event('input'));
  inputEl.dispatchEvent(new KeyboardEvent('keydown', {
    'key': 'Enter'
  }));
  tick();
  fixture.detectChanges();
  const de = fixture.debugElement.query(By.css('h2'));
  expect(de.nativeElement.textContent).toEqual('Updated Task 1');
  const updateCountDe = fixture.debugElement.query(By.css('h3'));
  expect(updateCountDe.nativeElement.textContent).toEqual('Updated: 1 times');
  expect(spy).toHaveBeenCalled();
}));
In the code shown above, we have to dispatch both input and keydown to make Angular aware of the change. Once, we verified that h3 was updated with the update count we checked that our spy was called.
Conclusion
There is a lot to testing NgModel in Angular. I have covered most of what I have learnt so far in the process of writing Angular tests.
Discover more from Shekhar Gulati
Subscribe to get the latest posts sent to your email.

it seems that the test ‘should keep input and h2 in sync’ does not work if you wrap input with a form tag. Please, have a look.